Introducing Smart Posts
What you need to know about the latest in communication automation
Reaching your audience has never been easier. With Smart Posts, you can automatically share the content your audience is seeking. Smart Posts are blocks of content that can be used to populate newsletters, and other topic-based media on multiple channels: email, social media, websites, and mobile apps. You create a Smart Post once, set it to share on your schedule, and then you can get on with other tasks while your audience sees the right Smart Posts automatically. At this point, you might be wondering,

Why would I use Smart Posts when I can use an Email Campaign?
In short, they fulfill different needs. As you know, an email marketing campaign is a series of email messages with a definitive beginning and ending. The email campaign has one clear goal, usually to have recipients complete one specific action, for example, book their next vacation getaway.
Smart Posts, in contrast, are pieces of content, usually topic-specific, that are meant to populate one-to-many channels. Some ways you would use Smart Posts are to
- create a website that informs an audience about the best ski resorts in Jackson Hole
- send an email newsletter that talks about what you should do during your Florida vacation.
While certain Smart Posts may be time bound, the website or the newsletter itself is ongoing without a definitive beginning and ending.
Let’s say you post content on a website for whitewater rafting adventures. You have three pieces that expire during the next month and five additional pieces that need to be added within the same month. Each piece has different start dates and end dates. With Smart Posts, you set the schedule for each piece when you create it and then your website is automatically populated with your content pieces.
What if you manage multiple sites, or want the same Smart Post on more than one channel?
A key component of Smart Posts is their use of tags to cross reference with your channels. For example, you can tag a Smart Post with “Florida Vacation” and also tag your email template with “Florida Vacation” to ensure your Smart Post is included in every email that uses that email template.
As mentioned earlier, you can share Smart Posts via several channels. For this post, we’ll walk you through sending Smart Posts via a recurring email to an existing lead list. We will create a Smart Post, cross reference it with an existing Beetle Eye email template, and then set up a recurring email with an existing lead list.
How To Create Smart Posts
The good news is, Smart Posts don’t require any coding. You simply add Smart Post content in the Beetle Eye application.
- From within the Beetle Eye application, select Smart Posts from the main navigation area.
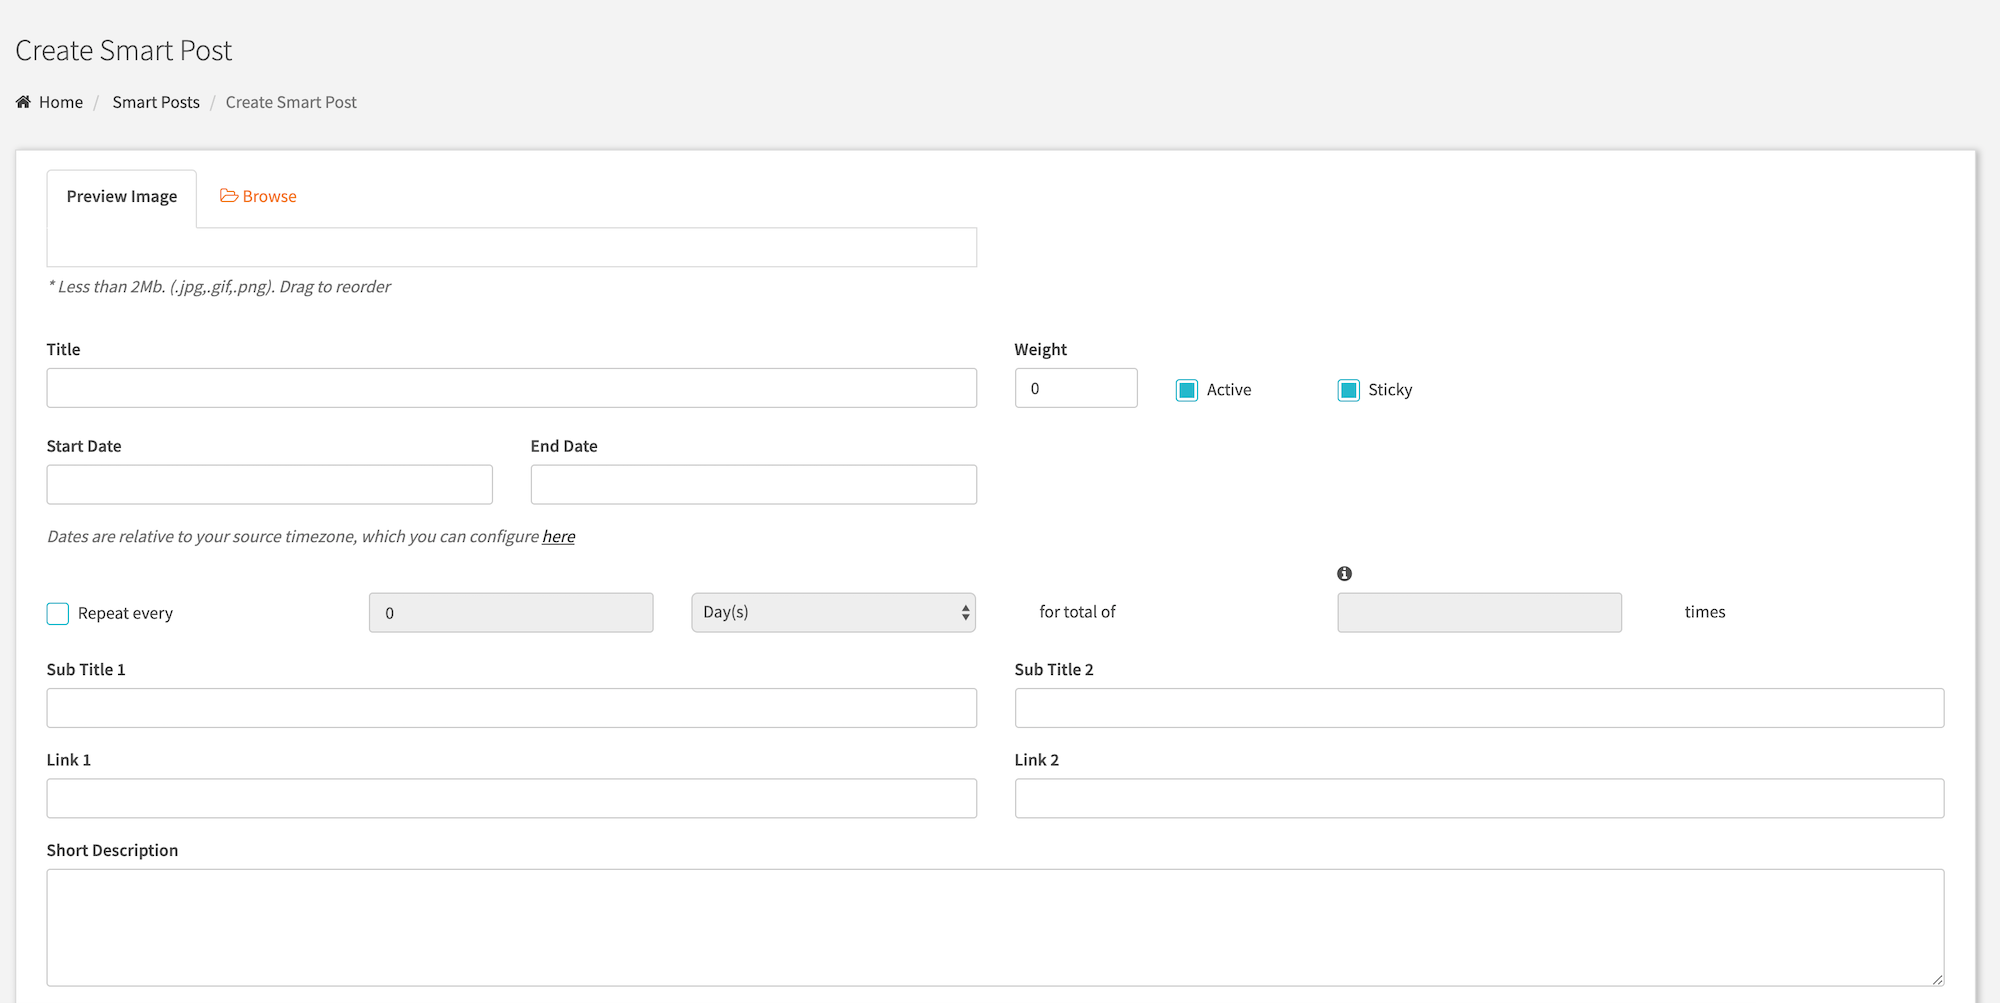
- Within Smart Posts, select Create Smart Post. The Create Smart Post screen displays.
A Smart Post has three required fields: Title, Short Description, and Long Description. While the remaining fields are not required, it’s a good practice to give as much detail about a Smart Post as possible. This will help later on, when you are configuring an email template or attempting to cross reference a Smart Post (hint: your Smart Post needs at least one tag to be cross referenced).
Required fields:
- Title The Smart Post Title is used to identify the Smart Post inside Beetle Eye and as the title text when displaying your Smart Post.
- Short Description The Short Description is used on a listings page as a snippet, or teaser, of information. This is handy when using Smart Posts to populate a website or a mobile application.
- Full Description The Full Description is used on the Smart Post profile page and gives the full Smart Post information.
- Preview Image A Smart Post can include one or multiple images. By default, the first image is used as a thumbnail when displaying a list of Smart Posts. Select Browse to add images.
- Weight This field is used when a Smart Post is part of a group of Smart Posts, such as on a news website. A weight of 1 pushes the Smart Post to the top, while a bigger number (e.g., 10) pushes the Smart Post lower on the list.
- Active This checkbox is checked by default. A Smart Post must be active to display in any communications.
- Sticky A Sticky Smart Post moves to the top of the list, superseding the weight setting and any ordering configurations of a list of Smart Posts.
- Start Date/End Date Use these fields to automatically set a Smart Post’s active range. The Smart Post will be inactive before the Start Date and after the End Date. Within the active range, the Smart Post can populate the channels you have set up. Note that if both fields are blank and the Active checkbox is checked, the Smart Post will remain active indefinitely.
- Repeat Every Check this box to set your Smart Post to be active on a recurring basis. For example, you have content that you want to share once a month. Check this box, enter a 1 in the field and select Month(s) from the dropdown (you can also enter 30 and select Day(s) from the dropdown). Your Smart Post will be inactive until the target date is reached, at which time it will become active for that date only.
- Subtitle 1 / Subtitle 2 / Link 1 / Link 2 Use these fields to add structure and information to your Smart Posts when they display in a list.
- Tags Use tags to cross reference Smart Posts with channels or leads. You can match Smart Posts with preferences on a subscription form, lead record interests, channel tags, etc.
- Custom Fields For when the standard fields don’t quite meet your needs, you have the option of using up to three custom fields. Simply enter any free-form data in one or more of the Custom fields and this information will be included with your Smart Post.
Remember, you want to add as many details as possible about your Smart Post.
To finish creating your Smart Post, simply select Save at the bottom of the form.
Link Smart Posts to an Email Template
To add Smart Posts to an Email Template, you will use the Visual Editor of an existing template. If you do not currently have a template set up with the Visual Editor, you may want to review this post before continuing. This allows you to drag and drop Smart Post Blocks directly into the editing area, without touching any code.
- From within the Beetle Eye application, select Campaigns > Email Templates from the main navigation area.
- Within Email Templates, select a pre-existing template that uses the Visual Editor. The Edit Template screen displays.
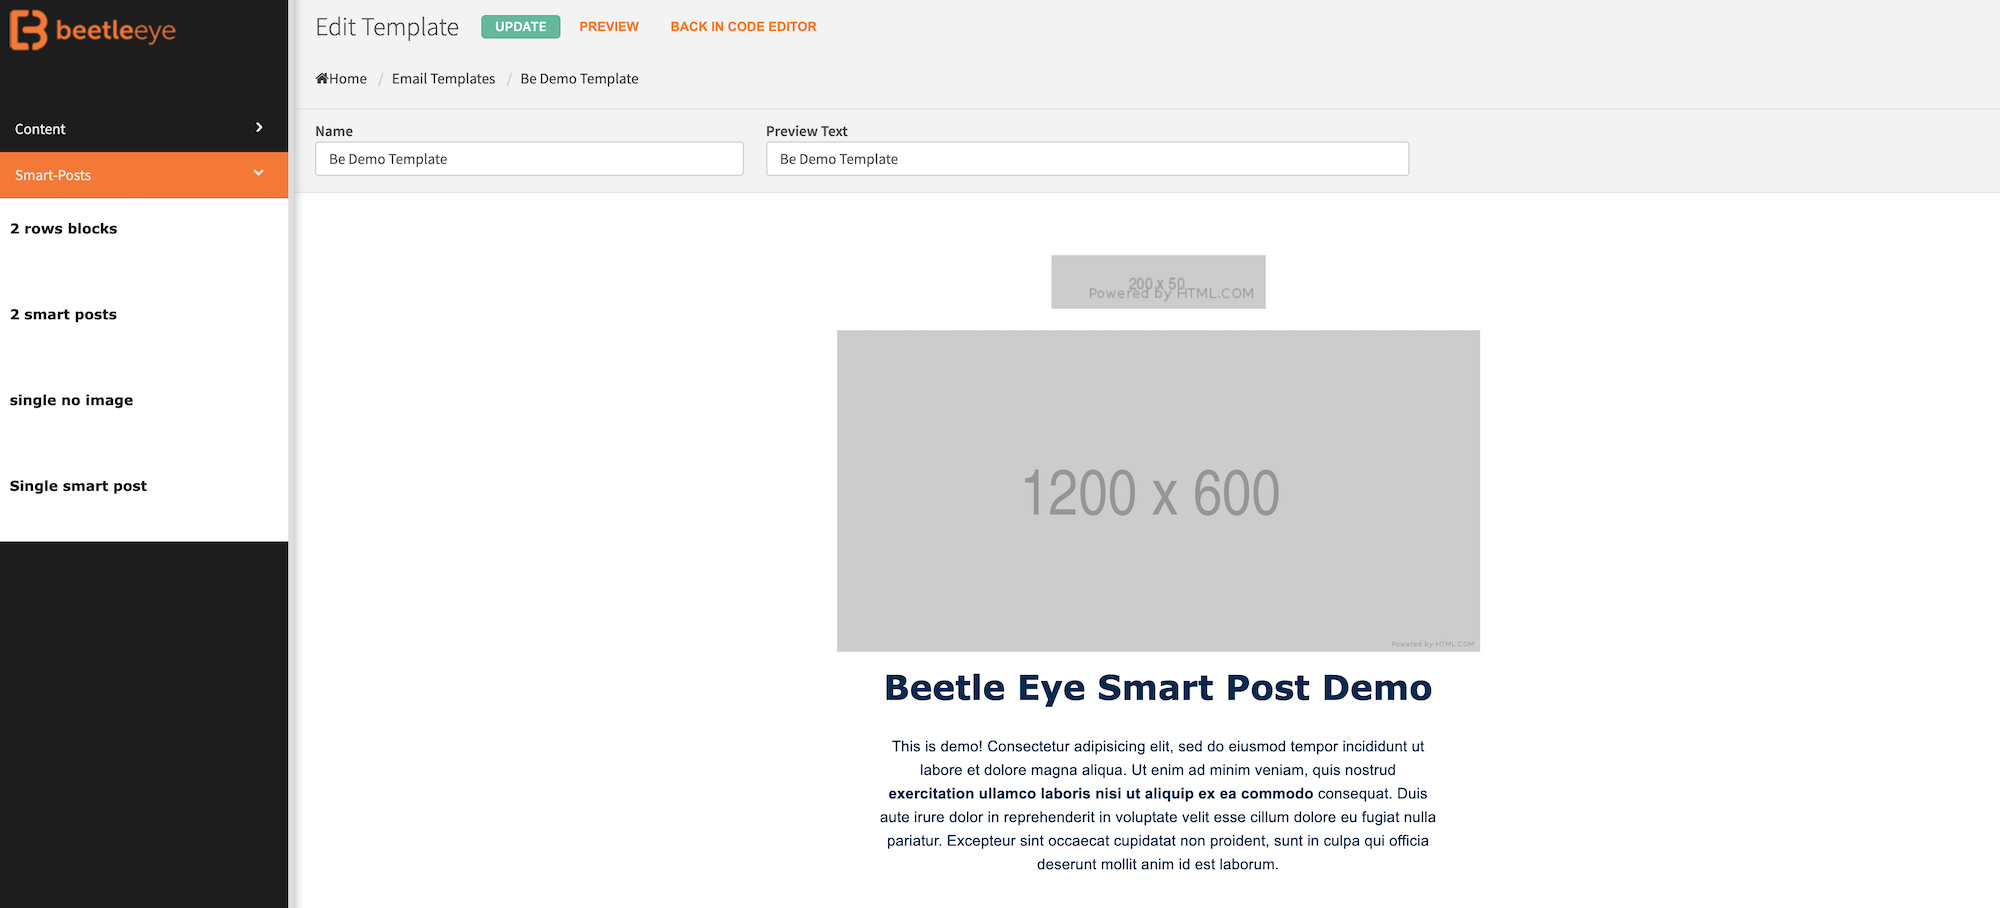
The Visual Editor is broken into two sections. The left-hand side presents the available content blocks and the builder is on the right-hand side. Within the builder section, a title and preview text already exists. You can edit these areas by clicking within them, as you would any text field. To add content blocks, simply drag and drop items from the left into the builder area on the right. Once added, you can rearrange blocks by dragging and dropping using the selector that appears at the top-middle of a block when hovering. You can also delete a block by selecting the X that appears at the top-right corner when hovering.
Smart Post Blocks
Smart Post Blocks represent the data you created within the Smart Posts editor. A Smart Post Block is responsible for the visual placement and formatting of the Smart Post itself within an email. You can drag and drop one or multiple Smart Post Blocks into an Email Template.
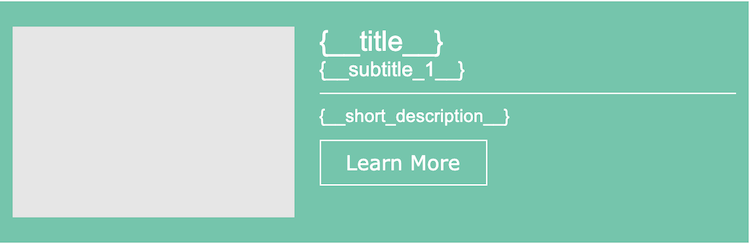
You’ll notice the Smart Post Block corresponds with the Smart Post Editor fields. For example, the “{_title_}” area on the Smart Post Block will be populated with data from the title field of the Smart Post, and so on. You can see how beneficial it is to fill in as many Smart Post fields as possible when creating your Smart Post.
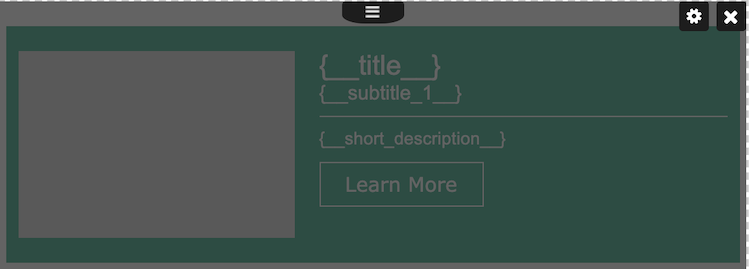
Once you drag and drop a Smart Post Block inside the Visual Template builder area, you have the shell of your template. You still need to tell the system which Smart Posts you want to display.
You can indicate which active Smart Posts to include and how those Smart Posts should be displayed. To do this, hover over the block and select the cog icon.
After selecting the cog icon, the Post Settings screen displays.
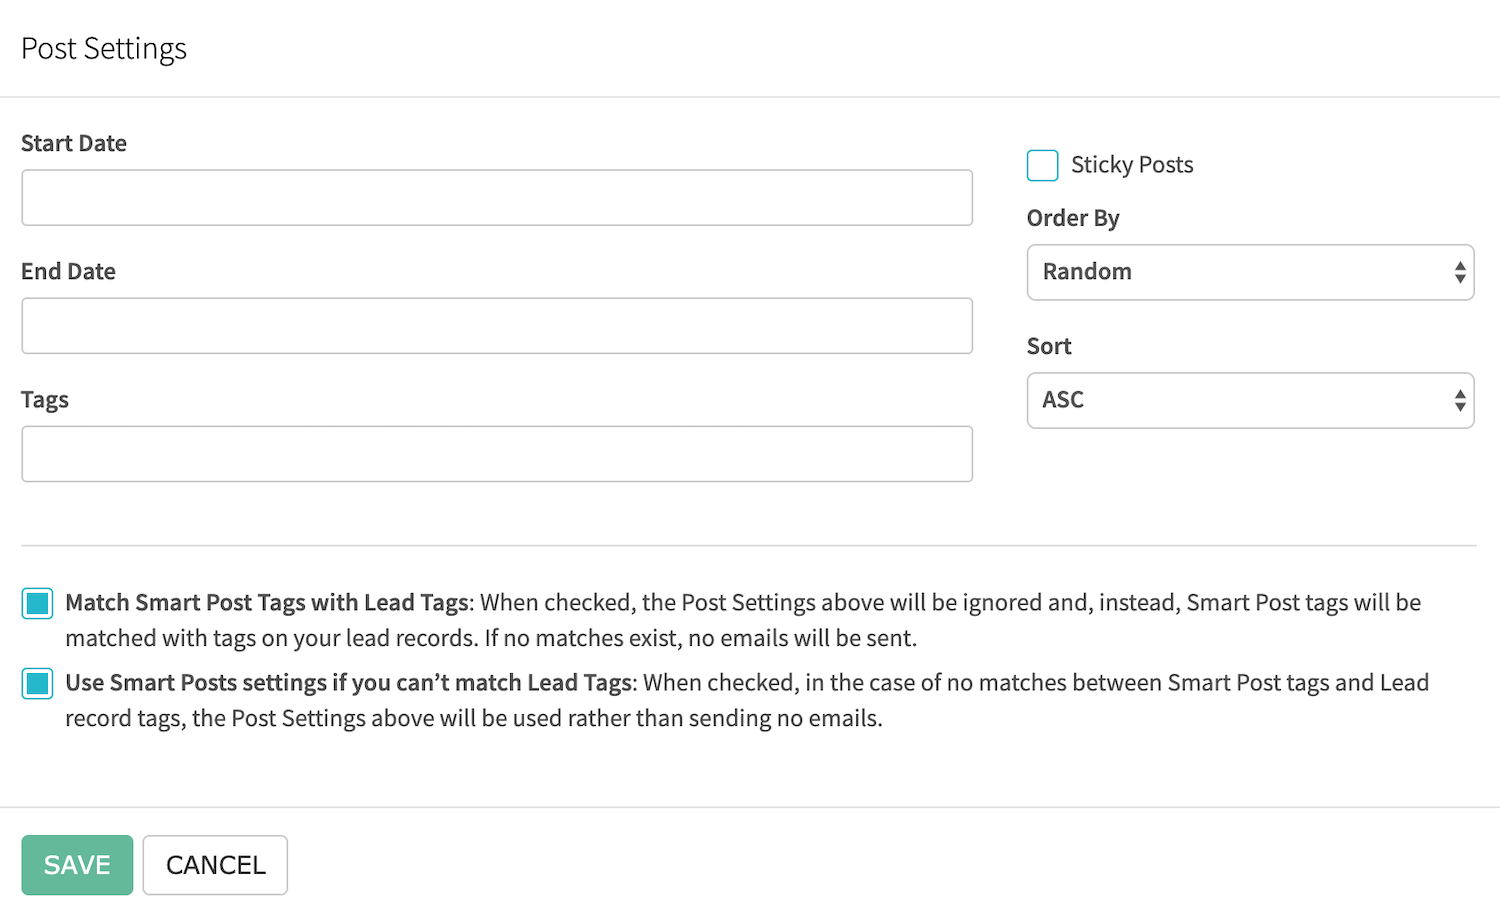
- Start Date and End Date Use the Start Date and End Date fields to include only Smart Posts that are active in a specific date range. For example, setting the Start Date to 1/1/2019 and the End Date to 1/30/2019 will include only Smart Posts that are active between January 1 and January 30. Leave both fields blank to include all Smart Posts that are currently active, regardless of the Smart Post Start Date and End Date.
- Tags Enter tags that match the tags on your Smart Posts. For example, if you want to include Smart Posts that use the tag “beach,” you need to add “beach” to this Tag field. Leave this field blank to include all Smart Posts that are currently active, regardless of the Smart Post tags.
- Sticky Posts Check this box to honor ordering in a list where Smart Posts with the Sticky option are included. Leaving this box unchecked will default to the settings chosen on this screen.
- Order By Indicate how the matching Smart Posts should be ordered: randomly, by weight, or show Sticky Smart Posts first.
- Sort Smart Posts are sorted alphabetically. You can set the sort to be ascending (ASC) or descending (DSC).
- Match Smart Post Tags with Lead Tags When checked, the Post Settings above will be ignored and, instead, Smart Post tags will be matched with tags on your lead records. If no matches exist, no emails will be sent.
- Use Smart Posts settings if you can’t match Lead tags When checked, in the case of no matches between Smart Post tags and Lead record tags, the Post Settings above will be used rather than sending no emails.
To link the Smart Post you created to the Email Template, be sure to include the same tag on both the Smart Post and the Post Settings.
Only one step remains: linking your Smart Post with an existing lead list by setting up a recurring email.
Set Up a Recurring Email with Smart Posts
Setting up a recurring email on an existing lead list is accomplished by adding a rule to the list. All the content is already in place. The important setting is to ensure you select the correct Email Template. The Email Template is what ties the Smart Post content to the email.
- From within the Beetle Eye application, select Lists > Lists Manager.
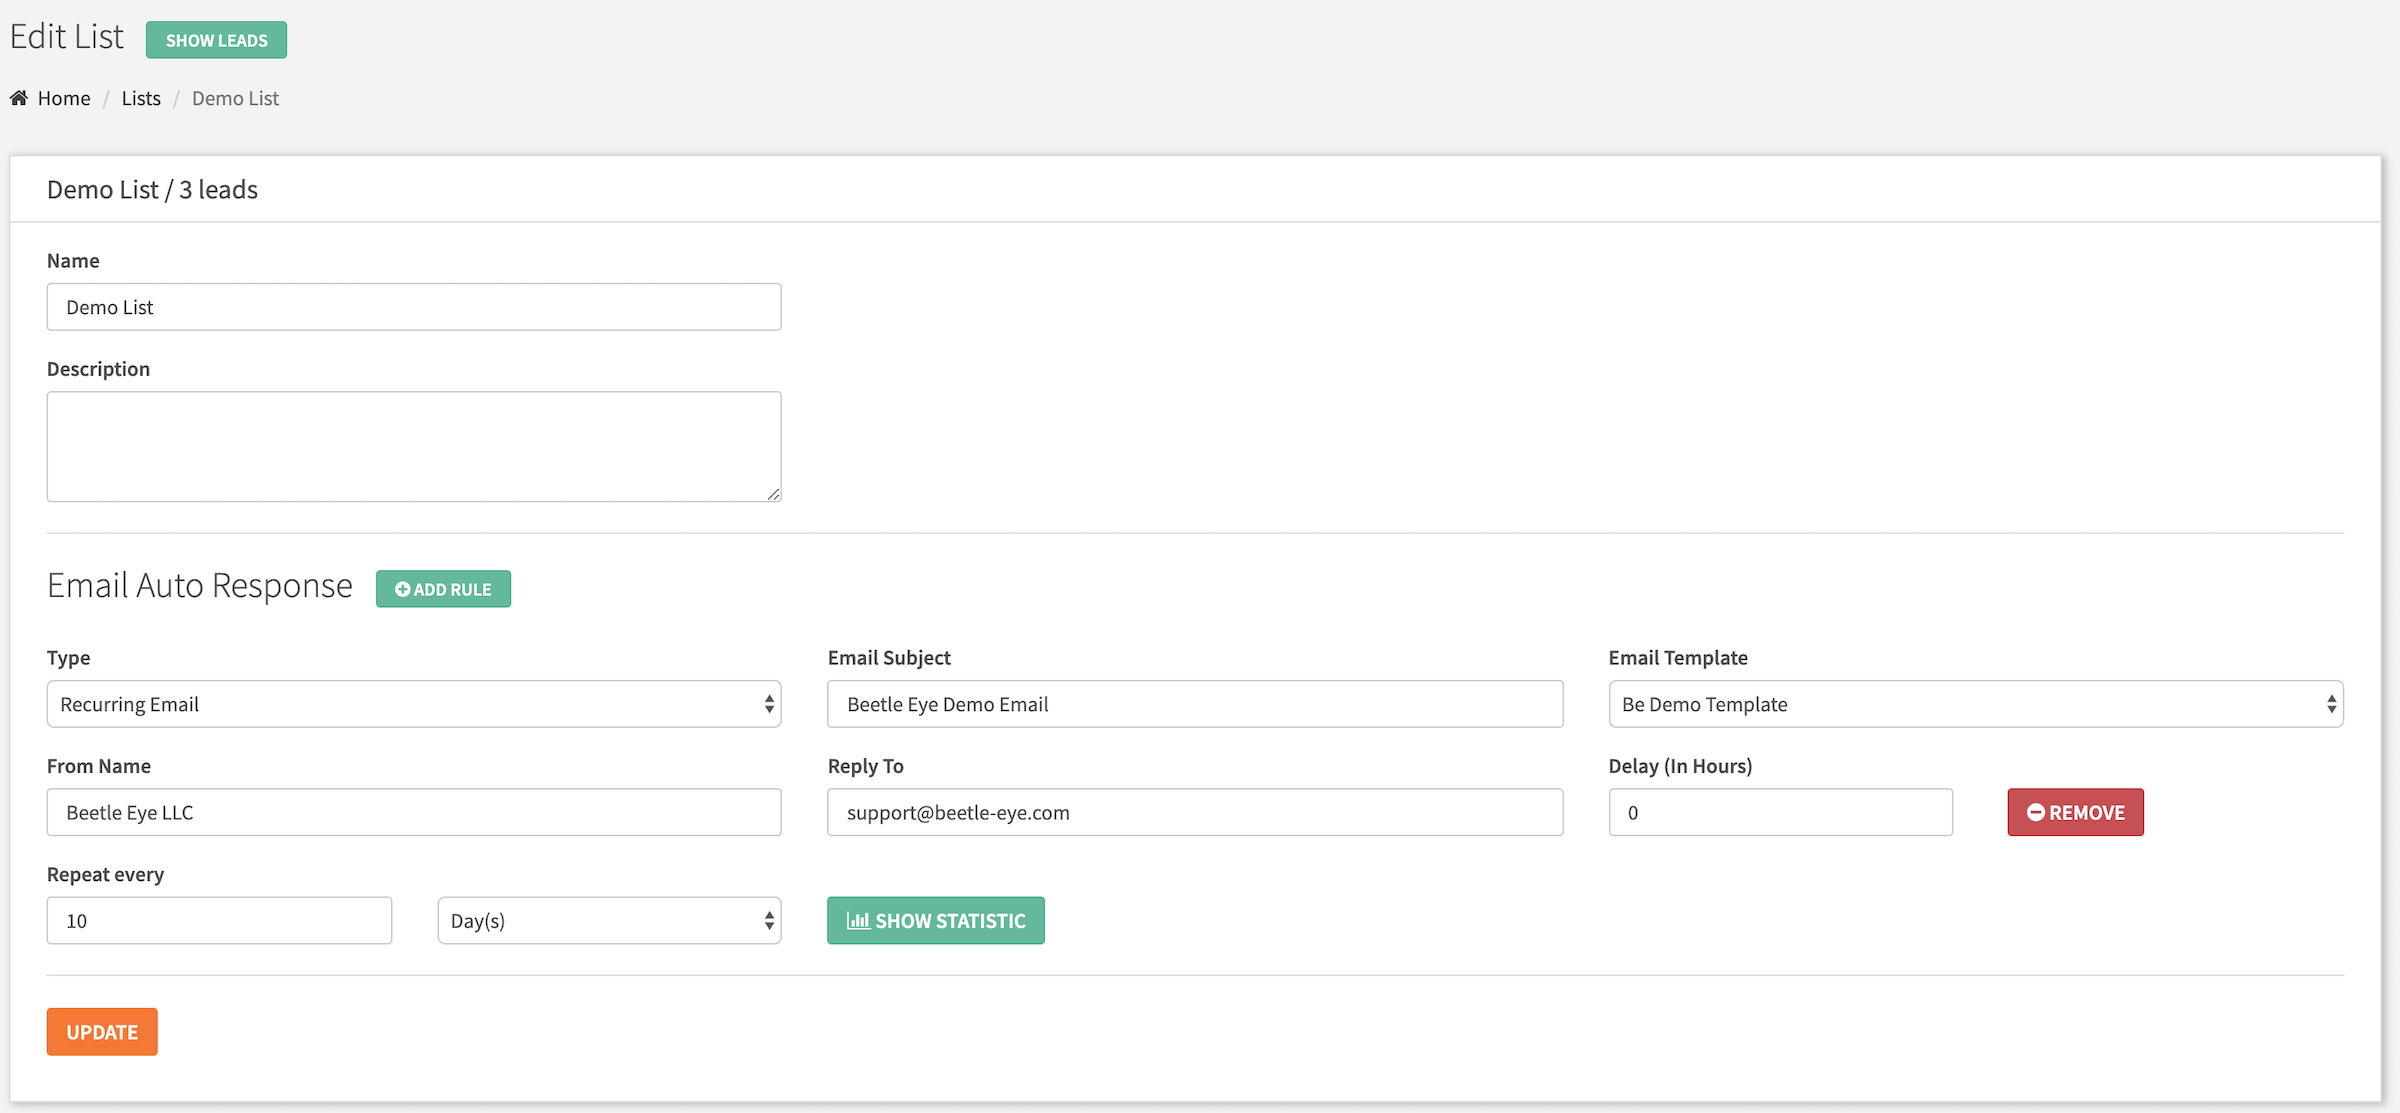
- Within List Manager, edit your desired existing list by selecting the list name or the edit icon. The Edit List screen displays.
- Under Email Auto Response, select Add Rule
- In the Type drop-down list, select Recurring Email.
- In the Email Template drop-down list, select the Email Template to which you have just linked your Smart Posts.
- Fill in the remaining fields as makes sense for your data.
- When ready, select Update to save the recurring email settings.
You are all set!
You can sit back and relax as your active Smart Posts will automatically be sent to your leads based on the configuration of your Recurring Email Rule and your Post Settings. As you Add more active Smart Posts and deactivate stale Smart Posts, the emails your lead list receives will automatically be populated with new content.
If you are interested of having Smart Posts under your account, please contact us for pricing.